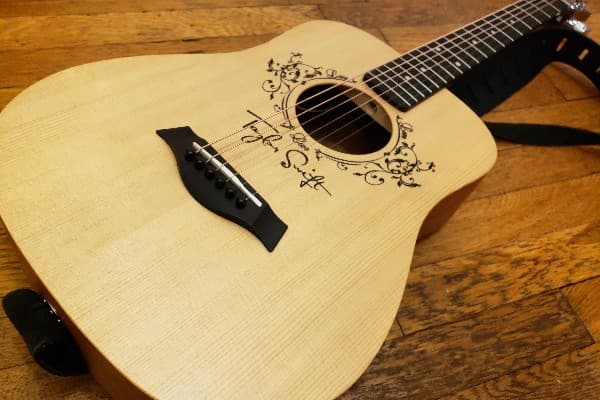
The last time we recorded acoustic guitars, it was a sweeping generalization and discussion. However, as this website is on quite the Taylor Guitars kick at the moment, for It’s Not Happening, we’ll focus on the Taylor Guitar that’s on hand: the TSBTe.
The TSBTe is the electro-acoustic version of their Taylor Swift signature model. Hopefully, a more nuanced approach and focusing on one guitar will make for less of an overexcited brain dump!

It’s Not Happening Taylor TSBTe: rig run down
- ASUS Chromebook Flip C100PA
- Samson Studio GT monitors
- Beyerdynamic DT-100 headphones
- SE Electronics 2200a
- Unbranded microphone stand
- Pig Hog 10ft XLR cable
- Taylor TSBTe
- Acoustic guitar strings: Ernie Ball Earthwood Medium Light
- Jim Dunlop Gator Grip 1.14mm pick
- BandLab free, online, in-browser DAW
Preparation
Even though I was in possession of new Samson MediaOne BT3 monitors, as noted in the production notes for the last podcast, they didn’t work so well with my Studio GTs.
So, in the interest of keeping things simple, I left them out of this session completely.
It’s Not Happening Taylor TSBTe: recording
Step one – set up
- Open Chromebook
- Position Studio GT – I just used the one with the audio interface built in; I focused just on tracking the guitar
- Plug Studio GT into Chromebook via USB
- Put the microphone in the microphone stand, and placed it in the vicinity of where it needed to be
- Plug the microphone into the GT Studio using the Pig Hog XLR cable
Step two – admin
Next, I had bounce down what I previously recorded…
- Log into my BandLab account
- On the left hand column, under Projects, click View All
- Click It’s Not Happening – bass – the saved project from the last recording session
- Click Open in Mix Editor
- At the bottom of the screen, click Download
- From the menu that appeared, click Mixdown As
- From the window that opens, select WAV
- Click Download button
- Finally, in the top left hand corner, click the Exit Mix Editor button
Now, I had to create a new BandLab project for recording my acoustic guitar tracks…
- From the screen that immediately followed from the last step, click the + Create button in the top right hand corner
- From the menu that appears, click the Import Track button
- Open Chromebook‘s Files app and drag the track i just mixed down
- In the new window asking for track information, just change the title to It’s Not Happening – acoustic guitars
- The next screen brings me to the player page for the newly created project, where it says that it’s processing
- Click on Open in Mix Editor, and there my project is, ready for adding acoustic guitars
- Now, click + Add Track in the left-hand navigation panel
- Click Voice/Mic from the window that opens
- You’ll see a track named Voice/Mic appear in the left-hand navigation panel – you just need to click that once to be able to rename it to what you’re about to record; in this case, we’ll just name it Taylor – I only have one Taylor guitar to record
Step three – recording the Taylor TSBTe
Get a level
Before cracking on with recording my lil Taylor, I need a level. I achieve this by playing the guitar into the mic, and making sure it’s not too quiet or to loud.
Until now, I glossed over getting a level, but it’s actually an important thing that I should give a little more time to.
However, the input level for digital recording is something hotly contested, and I’ve nothing to gain by getting into it.
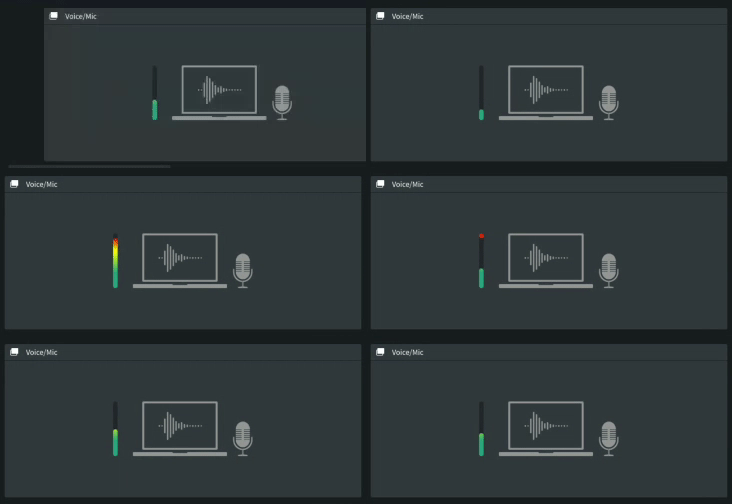
All these discussions get into specific numbers. However, in BandLab, the level meter doesn’t have any units, so you are exclusively eyeballing it. So getting into numbers is of no value whatsoever.

Previously, I was told when I recorded in a proper studio, was in digital, don’t let your input level get too hot.
Because my advice never had numbers, I guess I’ve always eyeballed it.
So, translating this advice to my own projects, means: “get the level just about yellow.” To demonstrate, here’s what that looks like in BandLab.

Obviously, that is not a science, but, as noted elsewhere, this isn’t Abbey Road and we’re not trying to be any kind of a hit factory.
However, for recording my Taylor for It’s not Happening, it’s perfectly fine.
Adjust the mic
As has been noted, in step one, we put the mic in the vague vicinity of where it would need to be. Now, it’s time to get a little bit more specific.
Similarly to input levels, there are a million and one purported “best” ways to record acoustic guitar.
And, as I’m a proponent of having one mic to record everything, in the shape of a large diaphragm condenser mic, I place mine vertical, with the front of the mic facing between the 12th and 16th frets of the guitar.
That’s generally regarded as the sweet spot.
Record the Taylor TSBTe for It’s Not Happening
Finally, click the red square and play your song!
Conclusion: It’s Not Happening Taylor TSBTe
To conclude, here’s what the Taylor sounded like by itself.
Finally, here’s what it sounds like in the context of the drums, bass, and other acoustic guitars, namely an Epiphone Hummingbird, and a battered old Gibson C-1.
As can be seen, there hasn’t been any post-production processing or editing.
I think it sounds pretty good. Following this, the next step is electric guitars, where we’ll focus on some low end rhythm.
If you found this helpful, subscribe on the right hand side of this page. You’ll get an email when new posts go live on Thursdays, inspiring you going into the weekend.
Share your own light audio recording thoughts and experiences! There’s a Facebook group, a Subreddit, Twitter and Instagram.
Also, feel free to shoot me a coffee!
