The last post covered the main tool of the light audio recording trade. Now, it’s time to apply it to what most people pay closest attention to in a song: the vocals.
I had some tweaking to do after the electric guitars mess. Additionally, I was going on an adventure.
Vocals: rig run down
- ASUS Chromebook Flip C100PA
- Samson Studio GT monitors
- Beyerdynamic DT-100 headphones
- SE Electronics 2200a
- Unbranded XLR cable
- Samson PS01 pop shield
And that’s that. Pretty tidy. I think it ties with bass for lowest amount of gear used?
Preparation
Before starting on vocals at all, however, I had to do something about BandLab. By the end of recording electric guitars, the project felt mostly pretty unusable. However, I toyed with the idea of bouncing tracks down, putting them in a new project, and seeing if that worked a little better.
In order to to at least get the vocals recorded, I just bounced down everything I’d recorded so far, exported it as a wav file, imported that single file into a new project… and I was finally ready to at least get vocals done.
As noted, I went on an adventure. Similarly to drums, I can’t adjust the volume on vocals, therefore I had to go elsewhere to record them.
I went to Astoria SoundWorks again, back into their room 8.
Recording
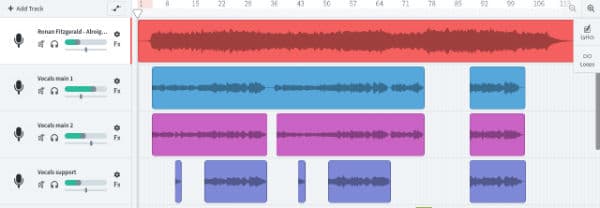
In the good old days of Reaper and command centers, I did three takes, do some mixing, and use all three on the finished track.
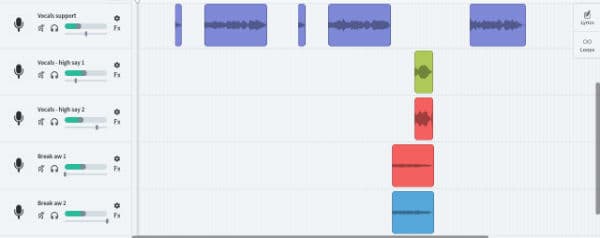
Whereas in light audio recording, I still did three takes, but I only planned to use two throughout the song, then, use the third to give a boost to the choruses.

Concurrently, I knew it would certainly need some backing vocals somewhere to keep things interesting, but didn’t have anything specific in mind. Following a listen to the main vocals, however, I had some inspiration for the middle eight, but I just did two takes of that.

Conclusion
| Pros | Cons |
|---|---|
|
|
I’m as happy as I can be with the vocals. However, I’m not super-satisfied with my performance. I hope I can pick out enough decent parts. But, we’ll have to wait until editing and mixing to see.
Finally, here’s where it’s at. For this purpose, the bounced music is low, and there’s no processing or effects. In the next post about recording, we’ll shake and rattle things to record some percussion.
If you found this helpful, subscribe on the right hand side of this page. You’ll be notified when new posts go live on Thursdays, so you can be inspired ahead of the weekend. Also, feel free to shoot me a coffee!